Showing posts with label Sharing. Show all posts

Thursday, 28 June 2012

(转载) How Millhiore F. Biscotti was Made Using 3DCG Sculpting!


以下将转载一篇有关3DCG做PVC Figure的文章
Author: Mikatan (All credit goes to Mikatan)
Original Page Link -


From DOG DAYS:

Millhiore F. Biscotti!
As I mentioned in the last post, today we’ll be looking at how the 3DCG data for the figure was made!
We’ll be taking a look from the very start of things! I’ll also be going into a bit of detail, so I think it’ll make for quite an interesting read!

Of course the one who told me all about it was Oda-P, who was in charge of Millhi’s sculpting!

Alright, let’s get into it!!


(1) Deciding on a Character (Planner)
Today’s model is of course DOG DAYS’ Millhiore F. Biscotti.
Nowadays you’ll hardly ever find an anime series, movie or game that doesn’t make use of 3DCG, but the data used for those is specially created to focus on movement. On the other hand, the 3DCG data for figures just needs be sculpted from clay into a fixed, non-moving model . That’s the main difference between common 3DCG and the 3DCG used for figure sculpting. Someone who can work with standard CG, knows the physique and build of the human body and also understands just what makes things ‘moe’ could easily work with a figure making team. We’ll go through the whole process that the director of the project goes through to reach the final product.

Ooh! As expected of Princess Millhi! That face at the bottom left is adorable!
So… we’ll use this illustration to make some 3DCG data?


(2) Modeling (3DCG Developer)
At first, the figure’s pose is not set in stone, so many ‘bones’ and joints are placed into the data based off the original illustrations of the characters, so that the pose can be easily changed at a later stage.
This 3DCG is made to be movable!


(3) Deciding on a Pose (Planner)
This time around, the pose was based on a scene from the ending!
Now we move back onto the modeling, using the pose we decided on.
Yes! A wonderful pose that really brings out the cute side of the Princess!!


(4) 3DCG Sculpting Stage #1 (3DCG Developer)
The original illustration didn’t feature the lower half of her body, so that part is simply done without a basis illustration. Eventually a first run of the 3DCG data is created, which will look something like the above.
Ah! She moved into her pose!
Although she still seems a little stiff…?
Ooh! Lemme see!!


(5) Adjustments to the Pose in #4 (Director)
The most common changes are adding in extra bends and twists.
It needs to be a smooth pose, but also one that brings out a dynamic feeling.
First the most obvious changes from the original illustration are brought up. In this case it was the way the hips were twisting – but changing that means changing all sorts of other things as well.

Checking poses using a figma!! ((((゚Д゚)))
I-I must admit, it does make it much easier to see the problems now!! (By the way, yhis Ayanami-san is Oda-P’s own personal figure.)


The pose features the right shoulder in front of the left, which means the right leg needs to further forward than the left one.

→ Which means, the left leg will have the most weight on it, so the left side of the pelvis should be placed higher than the right side.
→ Which means, the left shoulder should be lowered and the right shoulder should be higher so that the stomach area is bent horizontally.
→ This allows for the left and right sides to balance out with bends in the right place, creating a smooth, dynamic feeling.


The overall feel of the figure is also taken a look at here, and sometimes has some changes made on a larger basis too.
Getting all the changes right is the toughest part for the figure director. Here are the actual instructions that came with these images ↓

The twisting of the hips is definitely one of the most noticeable points of the illustration, and we’ve got a feeling for how the legs should look because of that now.
The left leg will be put out forward, putting most of the weight on it, meaning the left side of the pelvis should be raised, which in turn will require her left shoulder to be lower so the body looks like it is bending correctly. Even if you look at the illustration, I think the right shoulder does look higher than the left. I also think the angle of the hip should be tilted a little further, so that the right side of the hips is lower – if that causes the right foot’s toes to touch the ground, you’ll need tilt the foot back a bit more. The body as a whole also looks a bit long – perhaps it’s just a problem of perspective?


W-Wow…!!

It certainly shows that you need some feeling as to how the human body moves when doing this direction!


(6) Sculpting Adjustments (Director)
While the previous changes were more looking at physical errors, these are changes that need to be done as they differ from the original work.
So even areas like the inside of her skirt are all carefully directed to match up how they should – there really is no room to miss anything while doing this!


(7) 3DCG Sculpting Stage #2 (3DCG Developer)
After this point, you’ll start feeling the dynamic feeling that we are aiming for.
The pose really starts pulling together, and the 3D data is checked on once again. The whole model is spun around, so that it can be seen from any possible angle – to make sure there is nothing strange happening at certain angles.
The skirt is definitely a noticeable change – it’s much bigger now and looks a lot closer to the final figure I showed on the blog on Wednesday! You can also see the changes in the way the hips are turning now!


(8) Sculpting Adjustments (Director)
This is the final note of any more adjustments that need to be made. The biggest problem at this point was where exactly the legs should be inside of the skirt. Most of the instructions were to try and make it noticeable that the legs really are beneath the skirt.
We’re really moving into the finer details now! This is where the smallest of changes can really turn a good figure into a great one!


(9) Printing Out the Face
Obviously the whole figure will be printed out eventually, but the most important part to check for early problems is the face. Often after this print-out, small changes such as the bevel of the cheeks are changed – they are very small changes, but they all come together in the end.
It goes without saying that we all want a perfect figure, but of course the face is always the first thing you notice on a figure!!

The photo makes the face look quite big, but the changes that are done really are incredibly tiny – this goes for the prototype of course, but also for every single one of the figures made in mass production to get to you!


(10) 3DCG Sculpting Stage #3 (3DCG Developer)
The 3DCG Data is complete!
The creases in the skirt, and the line of the legs is now much more noticeable.


(11) Parts Partitioning (3DCG Developer)
Separating the different parts for production would be very difficult by hand, but with 3D data it’s a simple task!
At least, that’s what you’d think… but actually, it can be rather troublesome.

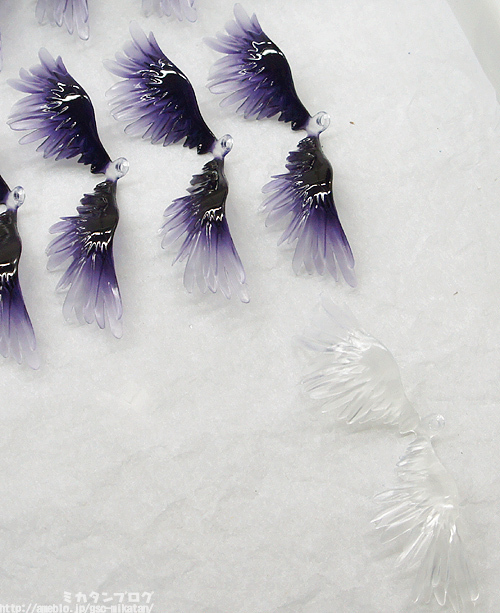
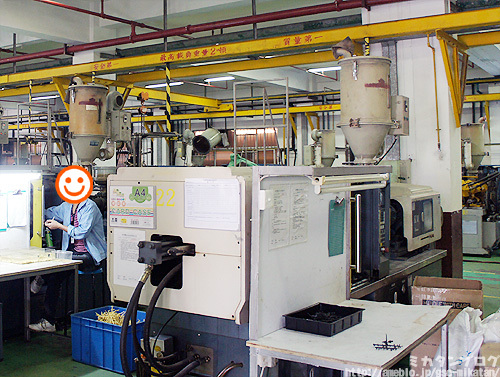
I’m sure a lot of you know, but the figures are all made up of various parts that are put together at a later stage! These separate parts are the ones that are made at the factories in China – and by using 3D data, it’s considerably faster to separate the different parts and save some much needed time!

Millhi ended up with 47 actual parts, 2 metal rods to be placed inside the figure and 2 parts for her base!


- Summary -
You often hear people say that as more 3DCG sculptors come into the world, many actual hand working figure sculptors will fall away – and to a degree, I think that is correct.

3DCG is considerably faster to work with as you don’t need to worry about the putty drying, surface finishing or any other problems caused by hand-done work. This obviously means you can get a lot more work done in a specific amount of time.

However, those who have been making hand sculpted figure for years have the experience and the theory behind the final products which can really help in the development of the 3DCG works. A lot of sculptors starting straight with 3DCG modeling will often have a hard time getting the representation of the body right at first.

Based on that, I believe that the experienced figure sculptors should work with the 3DCG modelling specialists, in order to create figures that have the charms that come from both sides of the table, and I believe that will bring us into the new age of figure sculpting!

- Oda

So the 3DCG modelers and the the original sculptors can put their strengths together to create great figures and save time all at once!

I must say that the one thing that really stands out after hearing all this, is that…

The voice of the director is very important!
For example, I’m fairly certain that if I had been directing the changes after seeing the scarecrow Millhi instead of Oda-P… something rather different would have come out at the end… I think the ability to do that direction is one of those skills you obtain after doing hand sculpting for a very long amount of time. I’ve tried doing it myself before as well… and I can say that while it’s fun… it’s very hard, and quite intriguing!

Another thing I wanted to get through to everyone though this article:
In the end, a professional is always going to be needed!

Someone who can take the 3D print-out and clean it up, or even improve the way it looks with some hand-made adjustments. Another very important part that we didn’t really touch is that of the painting, which is a very strong point of the figure as well – all these things have to be done by hand!

There are also all sorts of parts to the making of this figure that I didn’t include in this – I was just focusing on the sculpting – but there is a lot of work put in by a lot of people for every single figure that is released. Next time I have the chance, perhaps I’ll take a look at some other points in the production process as well.

Tuesday, 29 May 2012

Mikatan's Factory Field Trip! - 白熊感想

我就像很多人和熊一样曾经质疑PVC Figure是否真的卖的太贵,是否真的值得收藏。这次虽然没亲身参观PVC Figure工厂,但从Mikatan拍摄的照片里看见了PVC Figure复杂的制作过程。PVC Figure从模子里出来后就经过了层层的人手制作过程。每一个都费心费力,都是独一无二的精品(所以难免会有小瑕疵哦>o<)。虽是精品但也不是每个人都感兴趣收藏,且收藏目的和原因因人而异。对我而言,我看过许许多多的一流动画,虽有收藏高清DVD版但终究觉得少了些东西,少了些实在的东西。所以PVC Figure就能满足这方面的不足。凝望着PVC Figure的脸部表情,可爱的Pose,就能想起动画里的情节,还会暗里笑笑(拜托!买PVC Figure的人并不是变态和脑残哦)。但还是那一句吧,有多余的钱才买吧哈哈。:)

Friday, 18 May 2012

(转载) Mikatan's Factory Field Trip! - Part 3

以下将转载一篇PVC Figure的工厂参观及少许的制作过程,原文摘自于以下网页.
Author: Mikatan (All credit goes to Mikatan)
Original Page Link -

-----------------------------------------------------------------------------------------------

Onto part three of the factory trip!
So far we have been though the creation of molds and the actual molding process!

"It really, really is just like a taiyaki mold...!"

It's getting old now, I know - but it really is the easiest way to think about it!


"Taiyaki? Huh?"

If you're wondering about that then you probably missed out on the first two blog entries - you should read them first!

Mikatan's Factory Field Trip! - Part 1
Mikatan's Factory Field Trip! - Part 2

Now we move on to the painting process!


The first thing that needs to be done to paint a figure is getting the right colors...

Here we have the color-mixing room!

Completely unrelated to the painting process, but I have to add that the factory had tons of the ventilation fans seen in the above picture. It really made it feel like a factory.


Mixing colors!

"T-That's a LOT of paint!"

I guess this is what you'd expect for mass production... if you're going to need to paint a lot of figures I guess you will need a lot of paint...

A large rod about the size of a wooden sword was used to stir up the paints and mix the colors.


These parts are going to be painted!
These are the little parts that were molded in the previous article .
All those parts have been neatly organized into their respective containers!


Painting Production Line!
The factory workers all work with air brushes to neatly paint the little pieces.
Let's take a closer look...


Looks like some hair is getting painted!

"It looks like each person works on something different...?"


First it's given a base coat...


Then a gradient is layered on top!

You can see in this picture the ends of the hair use a darker yellow to create a nice gradient effect.

You can also see they are all painted nearly identically!

Even though the painting is all done by hand and done very efficiently, each piece still comes out almost identical to the next! This is the same for hundreds and thousands of the same parts! The factory workers are amazing at what they do!!


Bananas...?!
Nope, these must be twin-tails!

Even small parts like these still have the same gradient painting used on them. I only showed the one hair piece, but in actual fact almost all of the parts go through the same process.


Lunch time! Let's invade the cafeteria!
The factory workers all get lunch made for them at the cafeteria!
The person wearing the apron on the far right serves everyone!


Looks delicious!
And it was delicious as well! I had no problem with Chinese food at all.
I'll get more into the food another time though.


So after filling up with lunch it's time to continue the factory expedition!
This is a 'mask'!

"And... what exactly is a mask? "

If you're not sure about that one...
A mask is something like this...


The molded part is covered with the 'mask' to prevent certain parts from getting painted!
That's pretty much how it works.


In this example, just the white bits showing through the mask will be painted.
That white bit is actually...


Part of a Nendo Petite!
To actually see how tiny they are is almost unbelievable. They are absolutely minute!

Anyway, basically certain parts on each figure are painted this way over and over again!


The buttons are also done with masks!
These are actually parts of a figma... you can see just how finely the painting is done!


Huh? Is this also a mask?

It looks kinda like a Nendo Petite... but it's... pink!
This is a mask for the mouths!
A separate mask is needed just for the little mouth painting! Incredible!

The masks are also wiped down once in every few products to make sure that the painting doesn't go off target. It's the little things like that which really help create high quality products!


There are also some masks that have little holes to insert things into -
For painting both sides at once!

It seems there are a bunch of different kinds of masks that can be used. But just what is going to be painted with the mask in this image?


Areas that can't be painted with a mask are painted with a brush!

"Things like Nendo Petite's shoes are hand- painted with brushes....they don't use masks."


Ah-hah!
So there are some really small parts that can't use masks...

It's like each figure is handmade!


Masks are being made inside this bathtub like thing!

"This is the Sea of Decay."

That's from Nausicaä!


Copper is placed into some acid in order to make the masks...
But I'm afraid I didn't really understand this part too well myself. I'll try make better sense of it next time!!


The one thing that surprising me the most was this!

The place for the joints of a figma are padded with something...?
They are padded like this is so that no paint can get inside the joint area!

This is done for each and every joint!

That's just incredible...

The blond haired character at the start of this blog also had this padding to make sure no paint entered the joints.


I was also really amazed at this!
The gradient painting of wings!


The unpainted clear parts are in the bottom right.
The painted ones use a single color!

It shows how beautiful gradient painting can be! Plus they do it so quickly!
I grabbed a video as well, take a look: (Oh no, video seems lost link!)


Sunset in China.
It's about time for the working day to come to and end.

Although, there is still lots for the manager and Gakkun to work through. They need to find more and more ways to make the process smoother and better for the best products possible!

To everyone at the factory,
Thanks for all the hard work you do!

It was great getting to have a look around the factory, and I manged to learn a lot!
To think how many people work together to bring you just one figure is absolutely astounding.

Simply put, I'm going to be taking even more care of my figures now!

Keep up the great work!!

The next factory tour we'll be looking at how the eyes are painted!

I'll continue these blogs on days that there are no new products to take a look at, so look forward to the next one!

Once again though, remember that this factory tour was looked at very quickly and simplified for me, and I'm sure the actual process involves a lot more jargon and specifics - I hope that my fellow workers and experts in the field will forgive the basic explanations.

That's all for today!
I'll see you all again tomorrow! (・∀・)ノ゛

Thursday, 17 May 2012

(转载) Mikatan's Factory Field Trip! - Part 2

以下将转载一篇PVC Figure的工厂参观及少许的制作过程,原文摘自于以下网页.
Author: Mikatan (All credit goes to Mikatan)
- Original Page Link -

-----------------------------------------------------------------------------------------------

Time to continue our factory trip!
Yesterday I went through the making of the molds.

"So it's pretty similar to a taiyaki mold!"

... if that's how you're thinking about it, then you've got the right idea!


Remember that there are two kinds of molds though, the iron plate that cooks the taiyaki and the taiyaki itself. 

Today we'll look more into how the final mold - the actual sculptures, are created!


This is the machine that does the work!

You can't really see much from this angle though... it kind of just looks like a metal box...
There are actually a number of these machines all lined up in a row here.


But there is a little chimney thing on top of the metal box!

Here the raw materials are added!

For the taiyaki example this would be batter, but in the case of figures the main raw material is PVC!
So in other words, PVC is poured into this little chimney thing!


This is how the machine looks inside!

I'm pretty sure it's not a good idea to try putting your hand inside on of these.


Ah! A mold!

One of the molds from yesterday is placed inside the machine!! 

At this point the different sides of the mold are placed on either side, apart from each other. 


Just like a taiyaki mold would be before you pour in the batter!


Close up the yellow cover, and...

The molding begins!

I can't take photos of it in action, so I'll just explain it in steps: 

1) The two sides of the mold connect together! 
2) The PVC is poured into the machine, which pours it into the mold! 
3) The mold is cooled, causing the PVC to harden!


Molding Complete!

"Eh? What the heck is that weird rod thing?"


The rod is called the "runner", which is formed by the cracks that the PVC has to travel through! 

When the two sides of the mold are put together and the PVC is run through them, the PVC has to travel between the red lines in the photo in order to reach all the different parts of the mold. The position of the runner can have an impact on where the PVC reaches in the mold, so it requires quite a lot of planning to make sure the figure comes out with all the right details.


These are all the parts after the runners have been cut off!

The factory workers use cutting tools to cut the runners off carefully. The parts are then placed in water... 

This is to make sure they don't melt or lose shape in the heat!

The PVC is melted at an incredibly high temperature and then cooled to make it harden, however it still comes out quite hot when the cooling process is complete! At the point that is has just been cooled the PVC is very weak to heat, so they are quickly placed in water to make sure they keep to the correct shape.

What do you think those parts in the top left container are...? They look a little bit like the hair that sticks up on some Nendoroids.


Here some figma stands getting cut!

The stands have finished the molding process and are now being cut out one-by-one. Be careful not to cut your hand!


PVC leftovers!!

"That makes one super surreal photo...!"


Complete!

Some brand new hair parts! 
(・∀・)ノ

But we're not finished yet...


Little fixes with a craft knife!

Sometimes the cutting of the runner will leave little bumpy parts, so they are then carefully removed with a craft knife!

This worker even has a plaster on her thumb! 

The workers really left a good impression on me - even after getting cut a little on the job they would plaster up and continue!


Onto the filing!

Even after the craft knife, the pieces still go onto a filing process to make absolutely sure there are no unwanted bumpy surfaces. There were lots of girls working in the factory, this was another one!


Then onto the cleaning!

The white plastic gets dirty very easily, so each piece is then wiped down with little swabs like these.
We have yet another girl working in this photo... I really didn't mean to just take photos of the girls, but it somehow ended like that. There were a lot of girls working there, though!


All the figures you all collect at home all go through all of this! (`・ω・´)ゞ

They might be mass-produced, but they still go through a lot of manual work!

I'll get into the painting at a later stage... it's even more work... 

As a figure lover it was really interesting to go through the factory and see just how much work is put into the figures.


The parts are each displayed on a board!

Some of the parts are absolutely tiny, so they are displayed like this to make sure that none of the pieces go missing! Smart! 


Good work, molds!

After the molding process is complete all the molds are numbered and put into storage.


Names can even be written on the molds!

Any idea what this says?

It's Chinese for "Black Rock Shooter!"

Although I'm not sure why there is a "Q" at the start...

And that's it for the molding process!


So along with yesterdays blog I've now covered both parts of the molding process. 

There are a lot of mechanized parts to the process, but I was quite surprised at the amount of manual work as well. It's wonderful to know how much work is put into the figures that I display all over back home.

The next factory tour will cover the painting process!

I'll continue these blogs on days that there are no new products to take a look at, so look forward to the next one!

Once again though, remember that this factory tour was looked at very quickly and simplified for me, and I'm sure the actual process involves a lot more jargon and specifics - I hope that my fellow workers and experts in the field will forgive the basic explanations.

That's all for today!
I'll see you all again next week! (・∀・)ノ゛